Posts

Configure Linux as a Router

Image
Routing is forwarding data traffic between two or more computer networks according to given routing rules. Router perform this action which is connected to two or more data lines from different networks. When a data packet comes in on one of the lines, the router reads the network address information in the packet to determine the ultimate destination. Then, using information in its routing table or routing policy, it directs the packet to the next network on its journey. To reach internet for the PC or Laptop in above network, Linux box has to be configured as a router. It should route internal traffic to ISP router and internet traffic back to local network. We have two different methods to do this. Method 1. NAT local network from Linux box  This can be easily done with just a simple configuration on your Linux box. First you need to enable ip forwarding in your kernel parameters and then adding a NAT rule to iptables as follows. echo 1 > /proc/sys/net/ipv4/ip_forw

installing and configuring ndpi-netfilter for traffic controlling on RedHat/CentOS 7

nDPI is a ntop-maintained superset of the popular OpenDPI  library. Lots of projects have been done using this NDPI( Open and Extensible LGPLv3 Deep Packet Inspection Library ).  nDPI is used for application-layer detection of protocols, regardless of the port being used. This means that it is possible to both detect known protocols on non-standard ports (e.g. detect http non ports other than 80), and also the opposite (e.g. detect Skype traffic on port 80). This is because nowadays the concept of port=application no longer holds. List of protocols that can be detected using ndpi can be seen on ndpi page here.( http://www.ntop.org/products/deep-packet-inspection/ndpi/ )   Here i explain how to set up your own traffic controller using ndpi-netfilter which is very handy open project on github. Here we are setting it on on RedHat/CentOS 7 as a linux kernel module and use with linux iptables.  If you want to setup it on Ubuntu follow this separate tutorial as it is little bit

Installing and Configuring ndpi-netfilter for traffic controlling on ubuntu

nDPI is a ntop-maintained superset of the popular OpenDPI  library. Lots of projects have been done using this NDPI( Open and Extensible LGPLv3 Deep Packet Inspection Library ).  nDPI is used for application-layer detection of protocols, regardless of the port being used. This means that it is possible to both detect known protocols on non-standard ports (e.g. detect http non ports other than 80), and also the opposite (e.g. detect Skype traffic on port 80). This is because nowadays the concept of port=application no longer holds. List of protocols that can be detected using ndpi can be seen on ndpi page here.( http://www.ntop.org/products/deep-packet-inspection/ndpi/ ) Here i explain how to set up your own traffic controller using ndpi-netfilter which is very handy open project on github. Here we are setting it on on ubuntu 14.04LTS or newer as a linux kernel module and use with linux iptables.  If you want to setup it on RedHat/CentOS follow this separate tutorial as it is little

Configuring Check Point SSL Network Extender on Ubuntu 14.04/10

Image
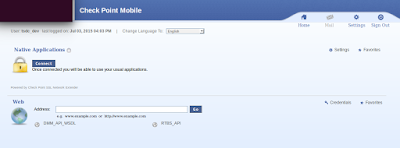
Configuring Check Point SSL network extender on windows will not be a problem, but configuring on linux may really a big problem if you couldn't install necessary dependencies and plugins. I, here describe how it was properly install on Ubuntu 14.04/10 and Linux Mint 17.2. I expect other Linux distributions will support this method. Follow the bellow steps. 1. You need to update the Ubuntu system first. use software updater or type the bellow command on terminal.   sudo apt-get update  sudo apt-get upgrade  sudo apt-get dist-upgrade  sudo apt-get autoclean 2. install JDK and icedTea plugin. you need to install jdk 6, because check point extender will not support for java version 7 and will give an error as "java unavailable".  sudo apt-get install openjdk-6-jre openjdk-6-jdk icedtea-plugin 3. Install necessary libraries.  sudo apt-get install libpam0g:i386 libx11-6:i386 libstdc++5:i386 4. restart the Ubuntu so that the changes to be taken effect.

VMware Unable to start service on linux

Image
A common problem when installing vmware on ubuntu is compiling the kernel modules. Normally after installing vmware workstation on linux, at the first time we run vmware it popped up a message saying that several modules must be compiled and loaded into running kernel. when compiling this modules it gives an error message saying that unable to start services. This problem can be successfully solved using following steps. 1. log in as root     sudo -i 2. Enter your root password 3. install the DKMS(Dynamic kernel module support) package.     sudo apt-get install dkms 4. install the "curl" command line tool for file transferring (many ways to do this without curl. normally i used curl)    sudo apt-get install curl 5. get the patch from Internet using curl.(you should have working internet connection)    curl http://pastie.org/pastes/9934018/download -o /tmp/vmnet-3.19.patch 6. run following commands one by one to run the patch.     cd /usr/lib